What $1,499 Buys in a Desktop Pick and Place Machine

A desktop pick and place machine at $1,499 buys a machine that is already built. The Vertex 4 arrives assembled, wired and calibrated, with a dual JUKI-compatible head, top and bottom vision, a 500 × 400 mm work area, 50 feeder slots and one set of manual tape feeders in the box. Build time runs 5 to 10 days.
That covers the machine and says nothing about your board. On my own bench the questions that have actually stopped an order are part height, part weight, lead pitch and panel size, and none of them appear on a price comparison page.

In the box at $1,499
The published specification reads:
| Item | Published |
|---|---|
| Placement range | 0402 and up |
| Work area | 500 × 400 mm |
| Camera | Top and bottom vision |
| Head | Dual, JUKI-compatible nozzles |
| Controller | Vertex 4 mainboard, Marlin firmware |
| Software | OpenPnP, with a pre-tuned configuration for JUKI nozzles |
| Feeders | One set of manual tape feeders |
| Theoretical throughput | Up to 2,000–3,000 placements/hour, board-dependent |
The throughput figure is the one to hold lightly. It is a machine capability on a cooperative board, and the parts of a real job that eat time are feeder setup, nozzle changes, fiducial searches and vision retries. For scale, hand placement on the same board runs around 200–600 placements an hour for a skilled operator, so the machine still wins the afternoon several times over.
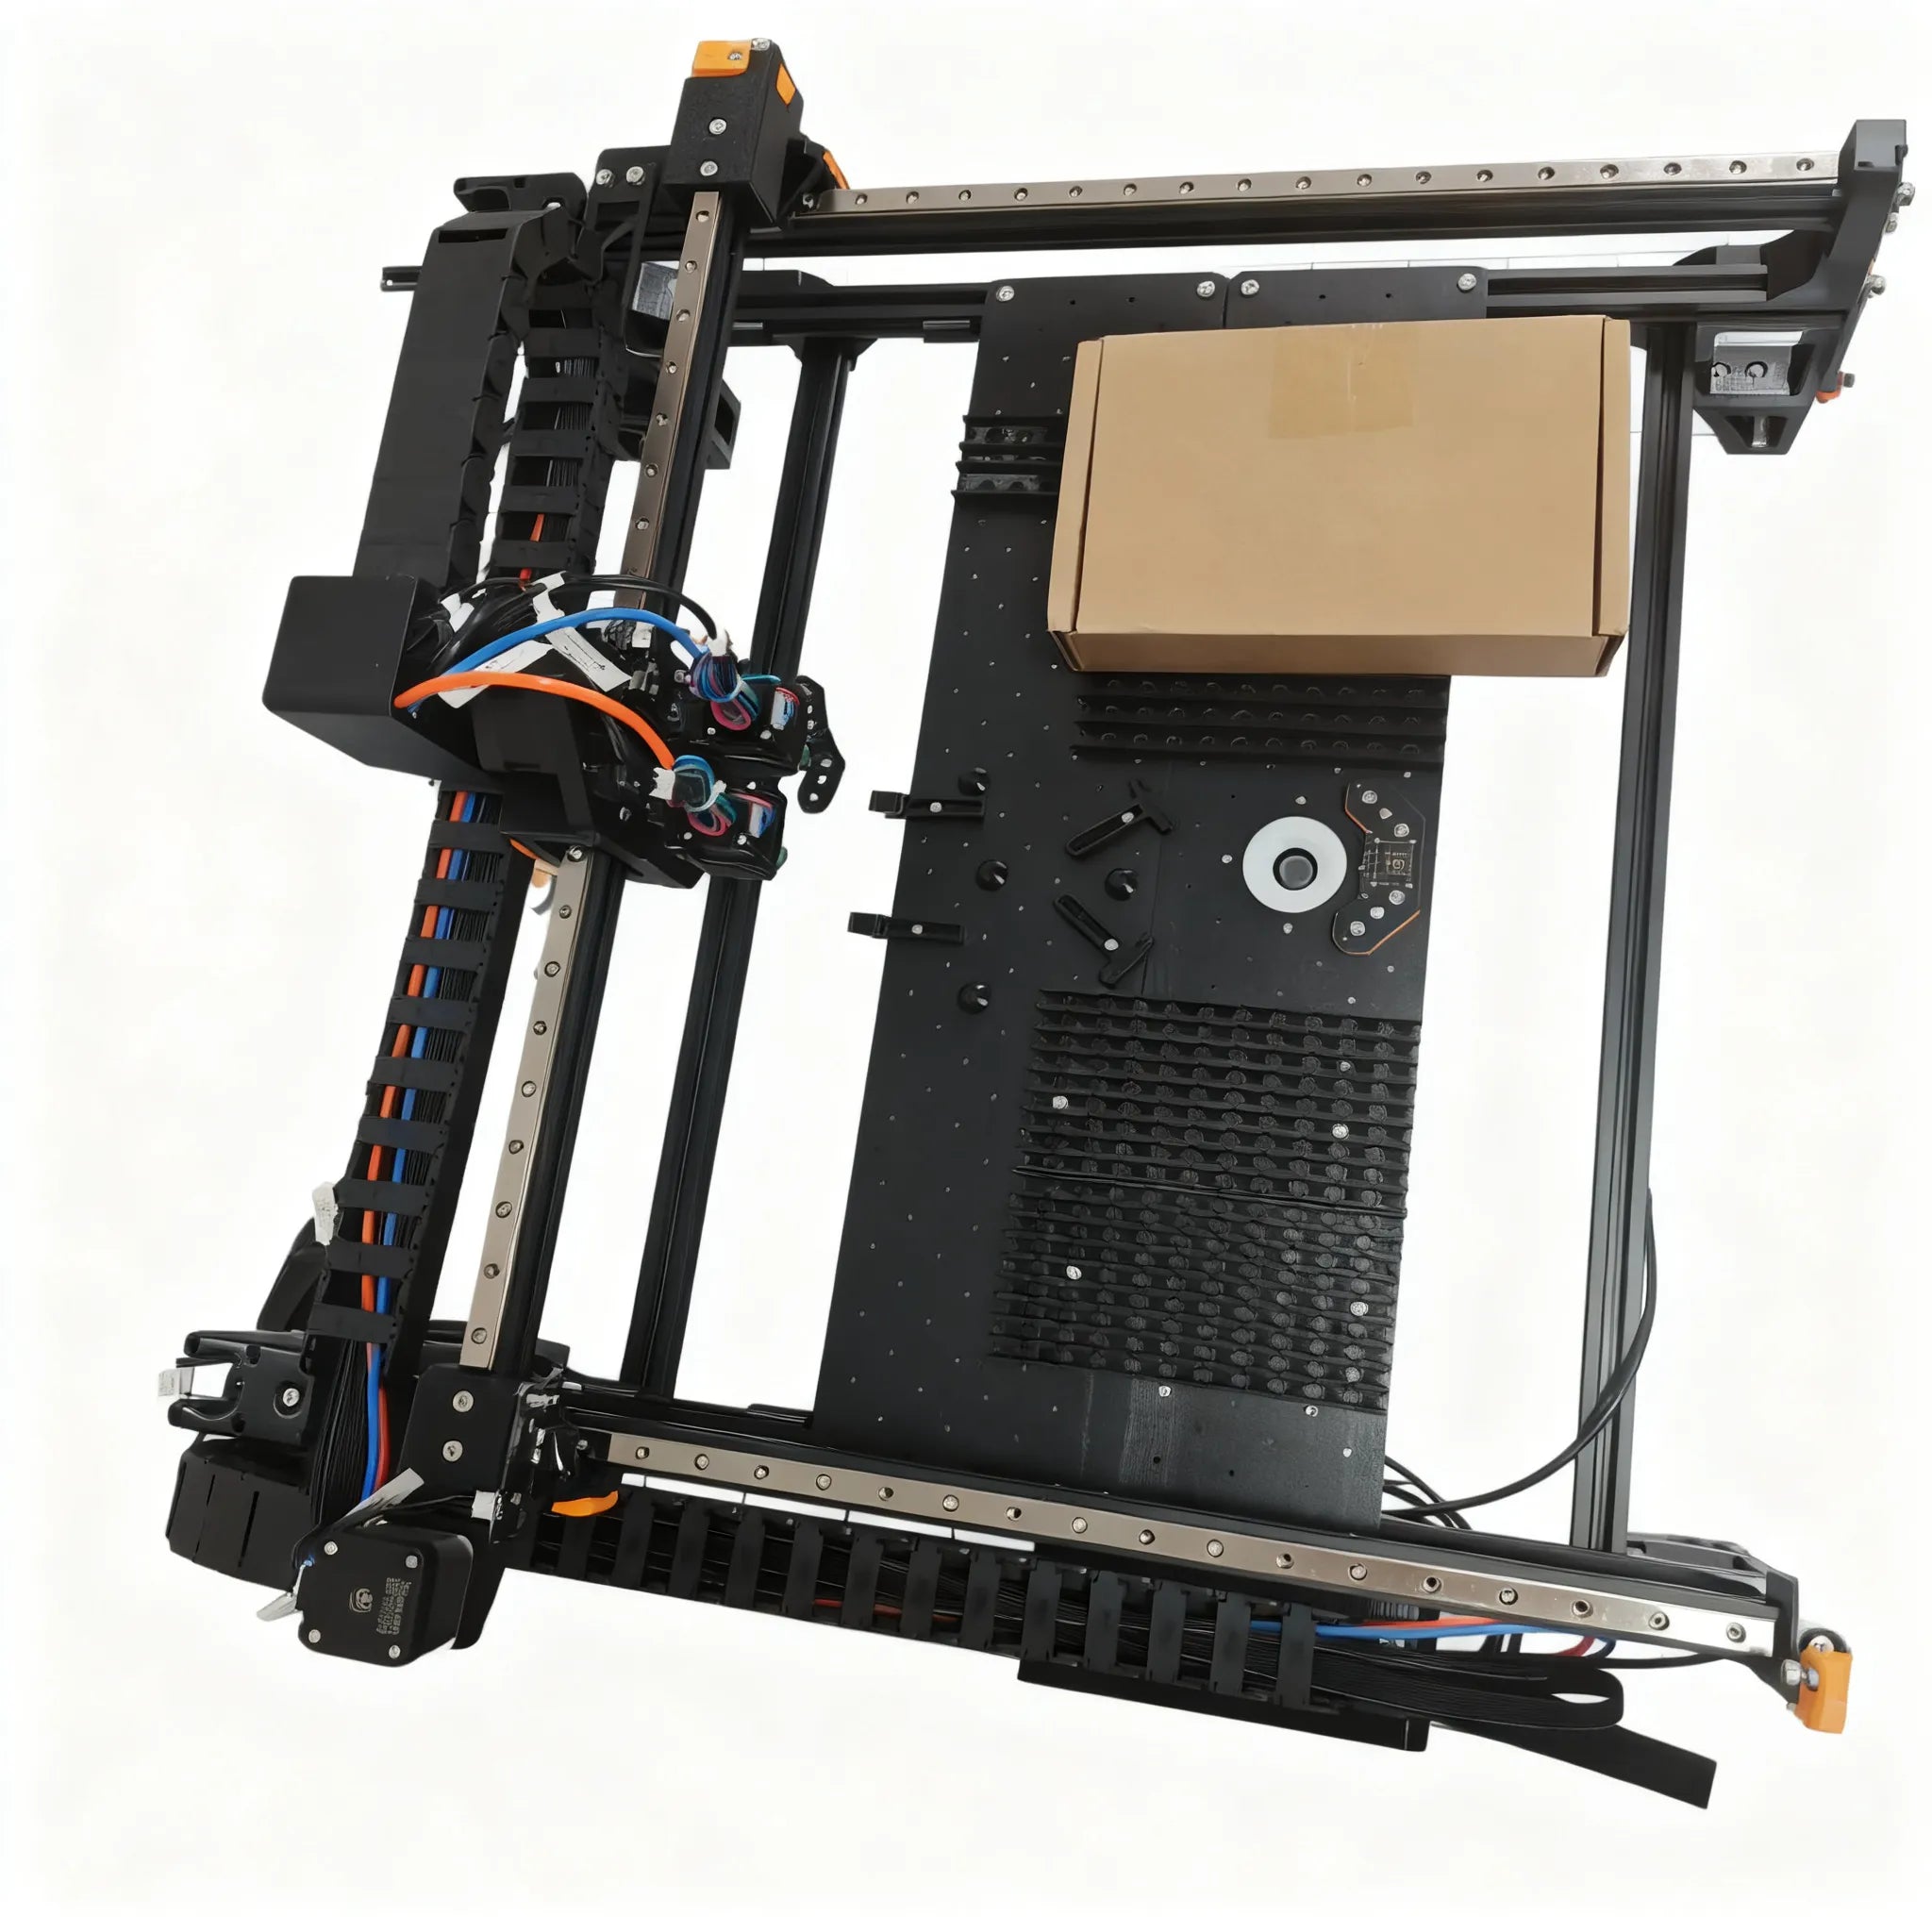
One item on that list answers a different question. The manual tape feeders are enough to start, and a board with twelve part numbers on 8 mm tape wants twelve powered feeders behind it. Feeders are the largest line on the invoice after the machine, and the cost breakdown here works through it with our own prices.
The part limits that decide the job
The platform the Vertex 4 is built on has published ceilings, and they hold for every configuration:
- Minimum part size: 0402
- Minimum lead pitch: 0.4 mm
- Maximum part height: 20 mm
- Maximum part weight: 25 g on an N75 tip
- BGA down to 0.8 mm pitch
Those five lines close off more boards than any price does. 0201 and 01005 parts are outside the platform, so a design built around 0201 does not become possible with a better nozzle or a slower feed rate. A 0.35 mm pitch connector is outside it. A 22 mm electrolytic capacitor standing in its tape is outside it, and a wound component over 25 g will not be held reliably whatever the nozzle.
The height ceiling is the one I see missed most often, because it is invisible on a board layout. Tape pockets stand parts upright, and a part that looks flat in the assembly drawing can be 24 mm tall in the reel. Check the tallest part against its datasheet height before anything else.
Part weight is the second. Pick reliability at the top of the range depends on the vacuum pump holding the part through the move, which is why the 25 g figure carries an N75 tip with it. Above the 506 nozzle the parts get heavy enough that the pump is the limiting factor rather than the tip.
The board has to fit between the staging plates
The build area is made of staging plates, which are 120 × 600 mm PCBs, and the published guidance is to keep the PCB under 210 × 390 mm, a figure that assumes a third staging plate is mounted. Panelized boards count against it. Two 150 × 250 mm boards in a panel are over the limit even though neither board is.
Three more board-side details come out of the same guide:
- Fiducials. Three of them, at the edges of the board, as far apart as possible, 1 mm diameter with at least a 2 mm soldermask opening. Fiducials packed into the middle of the board make the calibration worse, not better.
- Mounting height. The top surface of the board has to sit level with the datum board, which is 10 mm above the staging plate. A 1.6 mm board therefore sits with its underside at 8.4 mm. A custom fixture that misses this height misses the focal plane, and no software setting recovers it.
- Double-sided boards. These work, and they need two solder paste temperature profiles, the hotter one on the first side.
Feeders are a separate purchase
The set of manual tape feeders in the box takes a strip of tape and holds it still while the nozzle arrives. Powered feeding is bought on top of the machine: the powered feeder four-packs are $299 for an 8 mm or 12 mm, $319 in 16 mm, $329 in 24 mm, and $199 for the AS2 servo four-packs in every width. The 8 mm starter kit at $219 adds the 16-channel control board and the tool board the servo feeders need.
The platform ceiling is 50 automated 8 mm or 12 mm feeders, which is 50 unique components in tape. Strip feeders push that to 79 unique parts on one machine, and 16 mm and 24 mm powered feeders consume two of the 50 slots each. Chapter and verse on working out the real count is in how many feeders a board needs, and the physical layout is on the feeder overview.
What the next class up asks of your building
A Juki RS-1XL is the reference point most people have in mind when they ask me how far the desktop class is from industrial. Its manufacturer publishes 42,000 CPH optimum and 29,000 CPH under IPC9850, ±35 µm placement accuracy, components from 0201 to 74 mm square, 25 mm component height, and a maximum of 112 feeder inputs.
The utility requirements carry more weight than the speed in that table, because they are what the building has to supply:
- Power: AC 200–415 V, three-phase.
- Air: 0.5 ± 0.05 MPa at 200 L/min.
- Floor: 1,850 kg over 2,109 × 2,000 × 1,440 mm.
A desktop machine carries its own vacuum pump and runs from a wall socket. A used machine in that class, such as a 2010 Juki KE-2060 at a dealer listing of $39,800 I read today, arrives with the same infrastructure list plus rigging, a three-phase supply and operator training, and dealer spec sheets put it at 12,500 CPH for chips with ±0.05 mm laser accuracy.
Volume is not the comparison to make, and the arithmetic on a realistic month says more than that ratio does: 500 boards at 300 placements each is 150,000 placements, or 50 to 75 hours of continuous placement at the published theoretical rate. Hitting that ceiling assumes the machine runs for the better part of two weeks with almost no faults, which describes a design team working through revisions better than it describes a production schedule.
Where the desktop class pays for itself
What the $1,499 does buy is a short path from a finished design to a populated board. A stencil and a small oven are the rest of the line, the whole thing fits on a bench, and the setup swap between two products is a matter of feeders and a nozzle, not a changeover crew.
The other side of the same fact is that nothing moves the board for you. There is no conveyor and no line handoff, so each board is loaded, placed and unloaded by hand, and paste printing and reflow stay outside the machine on every revision.
The list I check before an order
- Tallest part in the reel, against the 20 mm ceiling.
- Heaviest part, against 25 g on an N75 tip.
- Tightest lead pitch, against 0.4 mm, with 0.8 mm the floor for BGA.
- Panel dimensions, against 210 × 390 mm, with three edge fiducials on the board.
- Distinct order numbers, counted by tape width, where 8 mm and 12 mm take one slot and 16 mm and 24 mm take two.
If a board clears the first four, the fifth is arithmetic, and the component size reference covers the package side of it in more detail. The parts that fail usually fail on height or weight, and both figures are printed on the component datasheet.